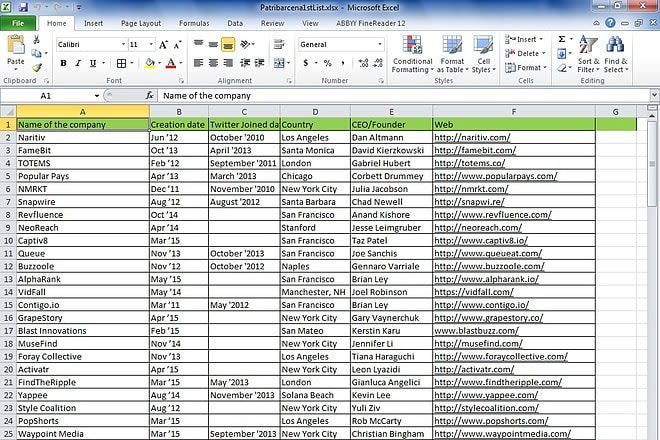
Data validation is one of the most powerful yet underused features in Excel, particularly for anyone whose work depends on accuracy — which is to say, virtually anyone doing data entry. Rather than relying entirely on careful manual review to catch errors after they’ve already been entered, data validation lets you build safeguards directly into your spreadsheet that prevent many mistakes from happening in the first place. Mastering these techniques can dramatically reduce error rates and save significant time on review and correction.
This guide walks through the key data validation techniques available in Excel, how to set them up, and how to use them strategically to maintain clean, reliable datasets.
Understanding What Data Validation Does
At its core, data validation in Excel allows you to define specific rules for what kind of data is allowed in a given cell or range of cells. If someone attempts to enter data that doesn’t meet the defined criteria, Excel can display a warning message, provide guidance on the correct format, or block the entry entirely, depending on how strict you set the validation to be.
This feature is accessed through the Data tab, by selecting the cell or range you want to apply rules to and clicking “Data Validation.” From there, a dialog box lets you choose from several validation types and customize the specific criteria for each.
Creating Dropdown Lists for Consistent Categorical Data
One of the most commonly used and valuable data validation techniques is creating a dropdown list, which restricts entries in a given cell to a predefined set of options. This is particularly useful for categorical data — status labels, department names, product categories — where consistency is critical for later sorting, filtering, or analysis.
To set this up, select “List” under the Allow dropdown in the Data Validation dialog, then either type your list of allowed values directly, separated by commas, or reference a range of cells elsewhere in your workbook that contains your list of valid options. Using a referenced range rather than typing values directly is generally preferable, since it allows you to easily update the list of allowed options later without needing to modify the validation rule itself.
Restricting Numeric Entries to a Specific Range
For numeric data — such as ages, quantities, prices, or percentages — you can restrict entries to fall within a specific minimum and maximum value. This prevents obviously incorrect entries, like an age of 350 or a negative quantity, from being accidentally entered due to a typo. Under the Allow dropdown, select “Whole Number” or “Decimal,” then specify your minimum and maximum acceptable values.
This technique is particularly valuable for datasets involving financial figures or inventory counts, where an accidental extra digit or misplaced decimal point can significantly distort totals or calculations if left uncaught.
Validating Date Entries
Similar to numeric range validation, Excel allows you to restrict date entries to fall within a specific range — useful for ensuring, for example, that a “date of birth” field doesn’t accidentally include a future date, or that a project deadline falls within a reasonable, expected timeframe. Selecting “Date” under the Allow dropdown lets you specify both the earliest and latest acceptable dates, with Excel flagging any entry that falls outside this range.
This is especially useful for datasets with recurring date-related errors, such as accidentally entering a date in the wrong format (day/month/year versus month/day/year), which validation can help catch before it causes downstream confusion.
Restricting Text Length
For fields with a specific expected length — such as a postal code, a specific ID format, or a two-letter state abbreviation — Excel’s “Text Length” validation option lets you set minimum and maximum character limits. This helps catch common data entry errors like accidentally leaving out a digit in an ID number or entering an abbreviation that’s too long or too short for the expected format.
Using Custom Formulas for Advanced Validation Rules
For more complex or specific validation needs that don’t fit neatly into Excel’s standard categories, the “Custom” option under the Allow dropdown lets you write your own validation formula. This opens up significant flexibility — for example, you could create a rule that ensures a cell’s value doesn’t duplicate any other entry in the same column, that a specific field is only filled in if another related field contains particular data, or that an email address entry contains an “@” symbol and a period, providing basic format validation.
Custom formula validation requires a bit more familiarity with Excel formulas, but it allows you to build highly tailored validation rules specific to the unique needs of a particular dataset or client’s requirements.
Adding Input Messages for Clarity
Beyond restricting what data can be entered, Excel’s data validation feature also lets you add an “Input Message” that appears automatically when a user selects a cell, providing guidance on what kind of data is expected before they even attempt to enter it. This is particularly useful for shared spreadsheets where multiple people, potentially with varying levels of familiarity with the dataset’s requirements, are entering data.
For example, an input message might read: “Enter a date in MM/DD/YYYY format” or “Select a status from the dropdown list,” reducing the likelihood of incorrect entries and the need for later correction.
Customizing Error Alerts
When someone attempts to enter data that violates your validation rules, Excel displays an error alert by default, but you can customize both the message and the severity of this alert. Under the “Error Alert” tab within the Data Validation dialog, you can choose between “Stop” (which blocks the invalid entry entirely), “Warning” (which allows the user to proceed after confirming they want to override the rule), or “Information” (which simply provides a notice without blocking the entry).
Choosing the appropriate alert style depends on how strict you need your validation to be — critical fields like financial figures might warrant a “Stop” alert, while more flexible fields might only need a gentle “Warning” to flag potentially unusual entries without completely blocking legitimate exceptions.
Circling Invalid Data in Existing Datasets
If you’re applying data validation rules to a dataset that already contains entries — rather than starting with a blank spreadsheet — Excel offers a helpful feature under Data Validation’s dropdown arrow called “Circle Invalid Data.” This automatically highlights any existing entries that don’t meet your newly applied validation criteria, making it easy to quickly identify and correct pre-existing errors in a large dataset without manually reviewing every single cell.
Combining Data Validation With Conditional Formatting
While data validation prevents incorrect entries going forward, combining it with conditional formatting provides an additional visual layer of quality control. For example, you might use conditional formatting to highlight duplicate entries in a column, even if data validation alone wouldn’t catch a duplicate that technically meets all other format criteria. Using these two features together creates a more comprehensive error-detection system than either one alone.
Removing or Adjusting Validation Rules
As your data needs evolve, you may need to adjust or remove validation rules — for example, expanding a dropdown list to include new categories, or loosening a numeric range as your dataset grows. This is done by selecting the relevant cells, reopening the Data Validation dialog, and adjusting or clearing the existing rules. It’s good practice to periodically review your validation rules on long-term or frequently updated spreadsheets to ensure they still reflect the dataset’s current, accurate requirements.
Applying Validation Rules Across Large Datasets Efficiently
When you need to apply the same validation rule across a large range of cells — an entire column of thousands of rows, for example — it’s more efficient to set up the validation rule on the full intended range from the start, rather than applying it to a small range and copying it repeatedly. Selecting the entire column or a generously sized range before opening the Data Validation dialog ensures that any new data entered later, even in previously empty cells, will still be subject to the same validation rules.
It’s also worth using the “Apply these changes to all other cells with the same setting” checkbox, which appears when editing an existing validation rule, to ensure consistency if you need to adjust criteria after the fact. This prevents a common issue where only part of a dataset ends up governed by updated validation rules, creating inconsistent enforcement across what should be a uniformly validated column.
Final Thoughts
Data validation is one of the most effective tools available in Excel for maintaining accuracy and consistency, particularly for anyone doing regular data entry work. By proactively setting up dropdown lists, numeric and date ranges, text length restrictions, and custom formula-based rules, you can prevent many common errors before they ever make it into your dataset, rather than relying solely on a manual review process after the fact. Mastering these techniques not only improves the quality of your work but also significantly reduces the time spent correcting mistakes down the line.